
Add Categories in Autodots Inventory – Easy Guide
Managing inventory is an important part of running a garage. If your parts and products are not organized properly, it becomes difficult to track stock and manage daily operations.
That’s why you should learn how to add categories in Autodots inventory so everything is properly structured and easy to find.
In this guide, you will learn step by step how to add categories in Autodots inventory and manage your stock more efficiently.
Table of Contents
What is Inventory Categories?
Inventory categories help you organize your products into groups. Instead of having all items in one list, you can divide them into categories like oils, filters, batteries, and spare parts.
When you add categories in Autodots inventory, it becomes easier to manage and search items quickly.
This makes your workflow faster and more organized.
Why Categories Are Important
If your inventory is not organized, you may face problems like missing items, confusion, and slow billing.
When you properly add categories in Autodots inventory, you can:
- Find items quickly
- Reduce confusion
- Improve billing speed
- Manage stock easily
This improves your overall efficiency.
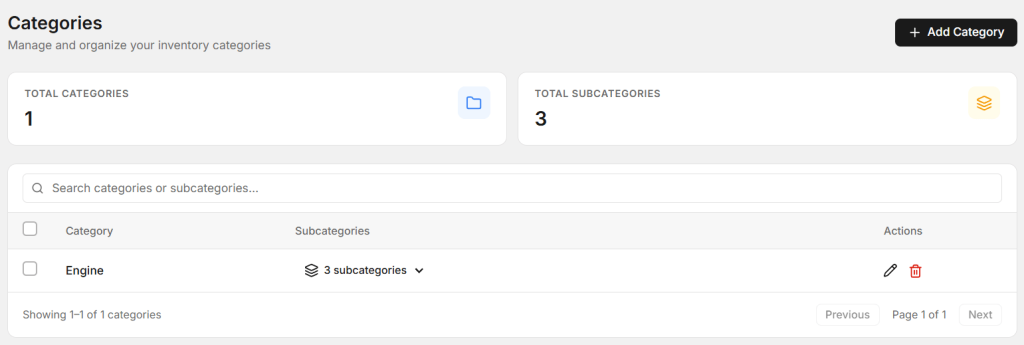
Where to Find Categories Section
To add categories in Autodots inventory, first go to your dashboard and open the Inventory section.
Inside Inventory, you will find the Categories option where all categories are listed.
This is the place where you can create and manage your categories.
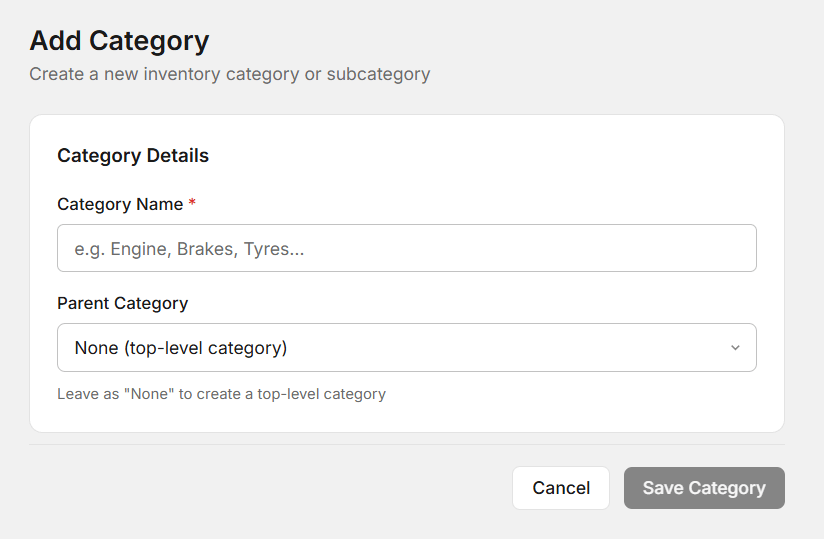
Steps to Add New Category
Follow these simple steps to add categories in Autodots inventory:
- Go to Inventory section
- Click on “Add Category”
- Enter category name
- Save
That’s it. Your category will be created instantly.
This simple process helps you quickly add categories in Autodots inventory without any confusion.
Examples of Categories
Here are some common categories you can create:
- Engine Oil
- Filters
- Batteries
- Brake Parts
- Accessories
When you add categories in Autodots inventory, try to keep names simple and clear.
Best Practices for Categories
1. Keep Names Simple
Always use clear and short category names.
2. Avoid Too Many Categories
Don’t create unnecessary categories. Keep it simple.
3. Organize Properly
Group similar items together.
These tips help you better add categories in Autodots inventory.
Common Mistakes to Avoid
- Using confusing names
- Creating duplicate categories
- Not updating categories
Avoid these mistakes when you add categories in Autodots inventory.
Start using Autodots for free and grow your garage faster
–> autodots.io/partners
How Categories Help Your Business
When you properly add categories in Autodots inventory, your work becomes faster and smoother.
You can quickly find items, manage stock, and improve billing speed.
It also reduces errors and saves time for your team.
Summary
Now you know how to add categories in Autodots inventory step by step.
Go to Inventory section, create categories, and organize your items properly.
A well-organized inventory helps your garage run smoothly.
Start now: Dashboard → Inventory → Add Category
Start using Autodots for free and grow your garage faster
–> autodots.io/partners
Looking to grow your garage business?
Want to learn more?
- How to Create a One-Click Invoice with AutoDots — The Fastest Way to Get Paid in 2026
- How to Create Estimates & Quotes with Autodots: Complete Guide for Garage Owners (2026)
- How to Add Products in Autodots Garage Management: Complete Guide (2026)
- How to Manage Parts Inventory with Autodots: Complete Guide for Garage Owners (2026)