
Managing suppliers is an important part of running a garage. You need to know where your parts are coming from and keep track of supplier details properly.
With Autodots, you can easily add suppliers in Autodots inventory and manage them in one place.
In this guide, you will learn step by step how to add suppliers in Autodots inventory, and also how to edit, update, and delete suppliers.
Table of Contents
What is Suppliers Section?
The Suppliers section helps you manage all your product suppliers in one place.
When you add suppliers in Autodots inventory, you can store their contact details and track them easily.
This helps you keep your inventory organized and improves your workflow.
Overview of Suppliers Dashboard
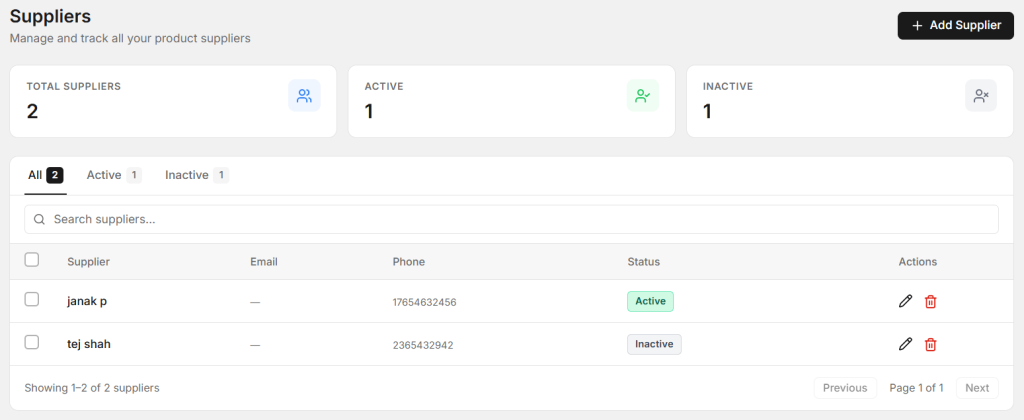
Suppliers dashboard showing active and inactive suppliers
In the Suppliers dashboard, you can see total suppliers, active suppliers, and inactive suppliers.
You can also search for any supplier using the search bar.
This makes it easy to add suppliers in Autodots inventory and manage them efficiently.
Steps to Add New Supplier
Follow these simple steps to add suppliers in Autodots inventory:
- Go to Inventory → Suppliers
- Click on “+ Add Supplier”
- Fill supplier details
- Click “Save Supplier”
This process allows you to quickly add suppliers in Autodots inventory without any confusion.
Supplier Details Explained
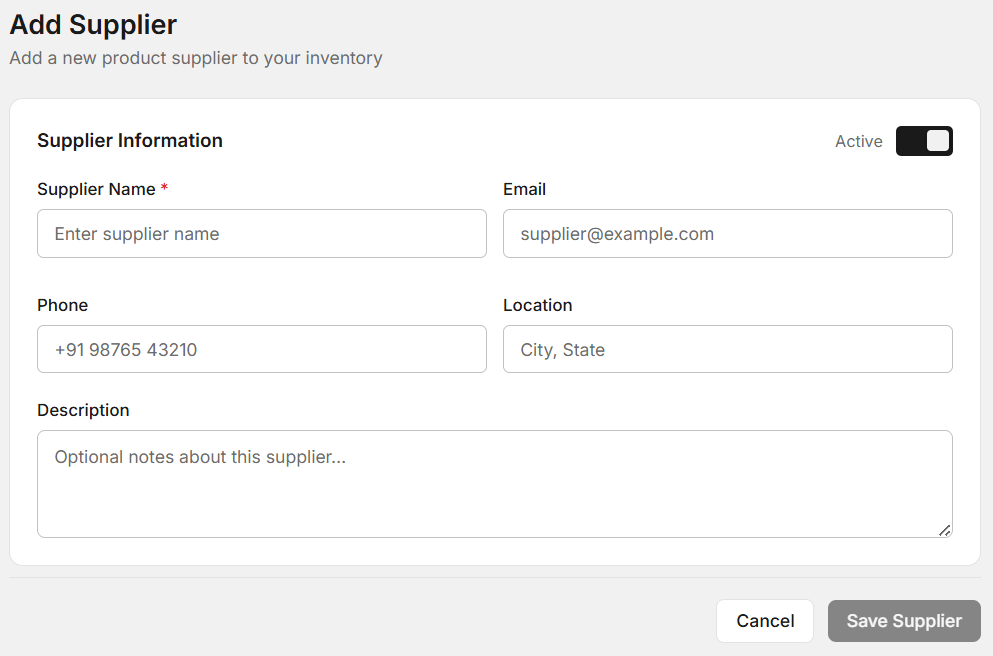
Add supplier form with all required fields
When you add a supplier, you need to fill the following details:
- Supplier Name
This is required. Enter the supplier’s name clearly. - Email
You can add an email address for communication. - Phone
Enter the supplier’s contact number. - Location
Add city or state information. - Description
Optional notes about the supplier.
These details help you properly add suppliers in Autodots inventory and maintain records.
Active and Inactive Status
You can mark a supplier as active or inactive using the toggle option.
Active suppliers are currently in use, while inactive suppliers are not used anymore.
This feature helps you better add suppliers in Autodots inventory and manage them efficiently.
How to Edit or Update Supplier
After you add suppliers in Autodots inventory, you may need to update details later.
To edit a supplier:
- Go to Suppliers list
- Click on edit
- Update details
- Save changes
This allows you to keep your supplier information up to date.
How to Delete Supplier
If a supplier is no longer needed, you can delete it easily.
Steps:
- Go to Suppliers list
- Click on delete
- Confirm deletion
Make sure to delete only when necessary while you add suppliers in Autodots inventory.
Best Practices for Supplier Management
1. Keep Details Accurate
Always enter correct contact information.
2. Use Active/Inactive Properly
Don’t delete suppliers if you may need them later.
3. Add Notes
Use description to store useful information.
These tips help you better add suppliers in Autodots inventory.
Common Mistakes to Avoid
- Adding duplicate suppliers
- Not updating contact details
- Deleting important suppliers
Avoid these mistakes when you add suppliers in Autodots inventory.
How This Helps Your Business
When you properly add suppliers in Autodots inventory, your inventory becomes more organized.
You can quickly contact suppliers, track orders, and manage stock efficiently.
This saves time and improves your overall workflow.
Summary
Now you know how to add suppliers in Autodots inventory step by step.
You can also edit, update, and delete suppliers easily from the dashboard.
Managing suppliers properly will help your garage run smoothly.
Start now: Inventory → Suppliers → Add Supplier
Start using Autodots for free and grow your garage faster
–> autodots.io/partners
Looking to grow your garage business?
Want to learn more?
- How to Create a One-Click Invoice with AutoDots — The Fastest Way to Get Paid in 2026
- How to Manage Parts Inventory with Autodots: Complete Guide for Garage Owners (2026)
- How to Add and Manage Services on Autodots Partner Dashboard
- How to Add Staff Accounts on Autodots Partner Dashboard
- How to Add Categories in Autodots Inventory (Step-by-Step Guide)