
Before you can use parts in your estimates and job cards, you need to first add them to your inventory. This guide will explain exactly how to add products in Autodots garage management — from filling in basic product details to setting pricing, stock quantity, and supplier information.
Table of Contents
Where to Find the Products Section
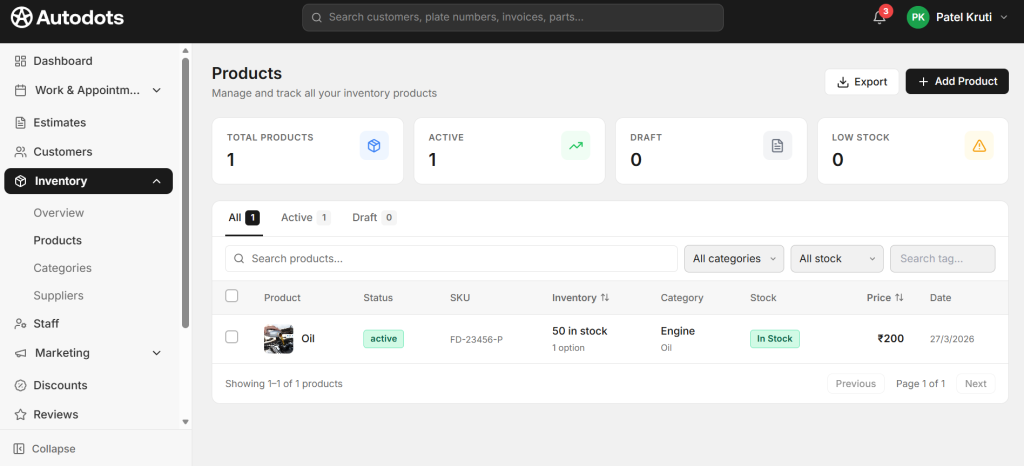
Log in to your Autodots partner dashboard. Click on “Inventory” in the left navigation menu, then click on “Products”. This is the main page where you add products in Autodots garage management and manage your complete parts list.
Products Page Overview
At the top of the Products page you will see four summary cards:
- 📦 Total Products — Total number of products added
- ✅ Active — Products visible and available for use in estimates
- 📄 Draft — Products saved but not yet published
- ⚠️ Low Stock — Products running low on quantity
Products List Columns
Each product in the list shows:
- Product — Product image and name
- Status — Active or Draft
- SKU — Unique product code
- Inventory — Stock quantity and options
- Category — Product category and subcategory
- Stock — In Stock / Low Stock / Out of Stock
- Price — Selling price
- Date — Date product was added
How to Add a New Product
To add products in Autodots garage management, click the “+ Add Product” button in the top right corner of the Products page. This opens the Add Product form where you fill in all the details.
Step 1 — Fill in Product Details
The first section of the form is Product Details. Fill in the following required fields:
Title and SKU
- Title — Name of the product (e.g., Brake Fluid, Engine Oil, Air Filter)
- SKU — Unique stock keeping unit code for the product (e.g., OIL-5W30-4L). This helps identify products quickly when you add products in Autodots garage management
Description
Add a detailed description of the product using the rich text editor. You can use bold, italic, underline, bullet points, and numbered lists to format the description clearly. This description is visible when the product is used in estimates and job cards.
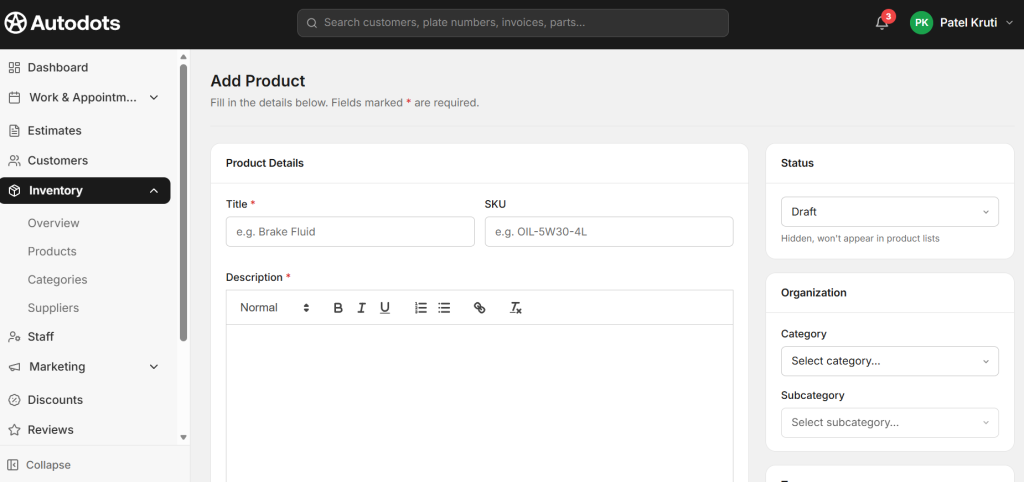
Step 2 — Set Product Status
On the right side of the form, you will find the Status section. Choose between:
Status Options
- Draft — Product is saved but hidden. Will not appear in product lists or estimates. Use this when the product is not ready yet.
- Active — Product is live and available to use in estimates and job cards immediately.
Always set status to Active when you want the product to be immediately usable after you add products in Autodots garage management.
Step 3 — Organize with Category and Tags
Category and Subcategory
On the right side, select the appropriate Category and Subcategory for the product from the dropdowns. For example:
- Category: Engine → Subcategory: Oil
- Category: Brakes → Subcategory: Brake Pads
- Category: Filters → Subcategory: Air Filter
Organizing products into categories makes it much faster to find them when creating estimates.
Tags
Add relevant tags to the product using the Tags field. Tags help you search and filter products quickly. For example, tags like “engine”, “oil”, “lubrication” for an engine oil product.
Step 4 — Upload Product Images
The Product Images section allows you to upload up to 5 images for each product. Either drag and drop images or click to upload. Adding product images helps your team identify parts visually when you add products in Autodots garage management.
Tip
Upload clear, well-lit photos of the actual part. This reduces confusion when multiple similar products are listed in your inventory.
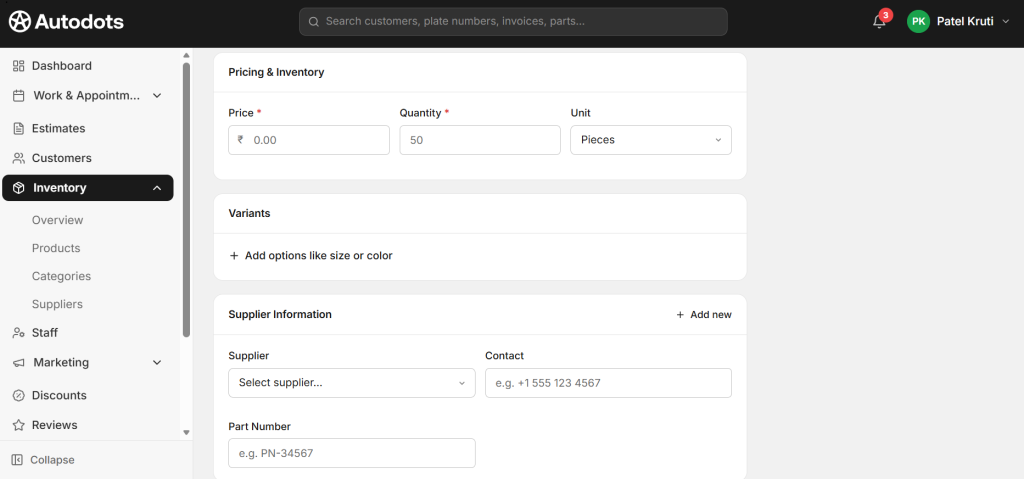
Step 5 — Set Pricing and Inventory
The Pricing & Inventory section is where you set the financial and stock details when you add products in Autodots garage management:
Required Fields
- Price * — Selling price of the product in ₹ (e.g., ₹200)
- Quantity * — Current stock quantity (e.g., 50 units)
- Unit — Unit of measurement (e.g., Pieces, Litres, Kg, Set)
Step 6 — Add Product Variants
The Variants section allows you to add different options for the same product. Click “+ Add options like size or color” to create variants. For example:
Variant Examples
- Engine Oil — 1 Litre / 4 Litre / 5 Litre variants
- Brake Pads — Front / Rear variants
- Air Filter — Small / Medium / Large variants
Each variant can have its own price and stock quantity when you add products in Autodots garage management.
Step 7 — Add Supplier Information
The Supplier Information section links the product to your supplier database:
Supplier Fields
- Supplier — Select from your saved suppliers list
- Contact — Supplier contact number (auto-filled if supplier is selected)
- Part Number — Supplier’s part number for this product (e.g., PN-34567)
Click “+ Add new” to link multiple suppliers for the same product. This is helpful when you source the same part from different vendors.
Step 8 — Add Internal Notes
The Internal Notes section (Optional) allows you to add any private notes about the product that are only visible to your team — not to customers. For example, storage location, handling instructions, or reorder reminders.
Step 9 — Save the Product
Once all details are filled in, click the “Save Product” button at the bottom right of the page. Your product is now added to your inventory and ready to use in estimates and job cards.
If you want to cancel without saving, click “Discard”.
How Added Products Connect with Estimates and Job Cards
Every product you add in Autodots garage management becomes instantly available in the Parts section of your Estimates and Job Cards. When you add a part to an estimate, the stock automatically moves to “Committed” and when the job is completed, it is deducted from your On Hand quantity automatically.
Benefits of Adding Products in Autodots Garage Management
For Garage Owners
- ✅ All parts organized in one central inventory
- ✅ Active / Draft status control — publish when ready
- ✅ Category and tag organization for fast searching
- ✅ Product images for visual identification
- ✅ Variant support — different sizes, types per product
- ✅ Supplier linking — know where each part comes from
- ✅ Part numbers saved — easy reordering
- ✅ Internal notes for team communication
- ✅ Automatic stock tracking when used in jobs
Final Thoughts
A well-organized product list is the foundation of efficient garage management. When you properly add products in Autodots garage management, you save time during estimate creation, reduce stock errors, and always know exactly what parts are available and where they come from.
Log in to your Autodots partner dashboard at autodots.io and start building your complete parts inventory today.
Read more: For Garage Owners — Grow Your Business with Autodots: Complete Partner Guide (2026)
How to Manage Parts Inventory with Autodots: Complete Guide for Garage Owners (2026)